はじめに
こんにちは。
システム開発部のこたつみかんと申します。
前回からだいぶ時間が経ってしまいましたが、今回はMatrixプロトコルのサーバー側実装を動かしてみます。
さまざまな理由でMatrixを取り巻く環境は大きく変わり、国内でも徐々に注目されるようになりました。
思ったより簡単にできますので、この機会にぜひ試してみてください。
Matrixのサーバー実装
現在Matrixのサーバー実装としてよく挙げられるものは以下の3つです。
- Synapse
- リファレンス実装です
- 枯れているため動作も安定しており、このような記事ではよく紹介されます
- Python3で開発されています
- Conduit
- 軽量なサーバー実装です
- 2023年4月現在ベータ版です
- 1クライアント1サーバーのような構成を意図しているため、システム要件は低いですが負荷への耐性が高いわけではありません
- ドイツ連邦教育省の支援を受けています
- Rustで開発されています
- Dendrite
- 第二世代のリファレンス実装として開発されています
- 2023年4月現在ベータ版です
- Goで開発されています
正式リリースされているのはSynapseのみという状況ですが、どのプロジェクトも活発に開発されています。
環境を構築してみる
それでは実際に環境を構築してみましょう。
現在はどの実装もDockerでの導入を紹介されるケースが多いのですが、動作の仕組みを確認するという意味で通常のインストールを行ってみます。
今回は軽量でご家庭での利用にも適したConduitを選んでみました。
公式の導入手順に沿ってDebian 11への導入を行っています。
なお、matrix-docker-ansible-deployも便利そうだったので試しに使ってみましたが、導入中にエラーが出て進行不能となってしまったため、残念ながら今回はご紹介できませんでした。
サーバー名を決める
導入中にサーバー名を設定する場面がありますので、インストール前にサーバー名を決めておいてください。
決まったらDNSにレコードを追加しておくのを忘れずに。
Conduitをインストールする
ConduitはLinuxで動作します。
パッケージは公式からdebが提供されています。
x86に加えてarmv7、armv8用もありますので、Raspberry Piのようなシングルボードコンピューターへの導入も可能です。
なお現在のビルドはDebian 11向けとなっていますので、glibcのバージョンが古い場合は自前でコンパイルが必要となります。
サービスを動かす準備をする
インストールが終了したら、サービスを動かすための準備をします。
まずは外部とのやり取りを行うため、ファイアウォールなどでポート番号443と8448を開放する設定を行います。
次にconduitを動かすためのconduitユーザーを作成します。
$ sudo adduser --system conduit --no-create-home
続いてsystemdへの登録を行います。
/etc/systemd/system/conduit.service を作成し、以下の通り設定を行います。
[Unit]
Description=Conduit Matrix Server
After=network.target


[Service]
Environment="CONDUIT_CONFIG=/etc/matrix-conduit/conduit.toml"
User=conduit
Group=nogroup
Restart=always
ExecStart=/usr/sbin/matrix-conduit


[Install]
WantedBy=multi-user.target
設定したら、
$ sudo systemctl daemon-reload
で反映させます。
Conduitの設定を行う
Conduit側の設定を行います。
設定ファイルは /etc/matrix-conduit/conduit.toml に作成します。
[global]
# The server_name is the pretty name of this server. It is used as a suffix for user
# and room ids. Examples: matrix.org, conduit.rs


# The Conduit server needs all /_matrix/ requests to be reachable at
# https://your.server.name/ on port 443 (client-server) and 8448 (federation).


# If that's not possible for you, you can create /.well-known files to redirect
# requests. See
# https://matrix.org/docs/spec/client_server/latest#get-well-known-matrix-client
# and
# https://matrix.org/docs/spec/server_server/r0.1.4#get-well-known-matrix-server
# for more information


# YOU NEED TO EDIT THIS
server_name = “サーバー名"


# This is the only directory where Conduit will save its data
database_path = "/var/lib/matrix-conduit/"
database_backend = "rocksdb"


# The port Conduit will be running on. You need to set up a reverse proxy in
# your web server (e.g. apache or nginx), so all requests to /_matrix on port
# 443 and 8448 will be forwarded to the Conduit instance running on this port
# Docker users: Don't change this, you'll need to map an external port to this.
port = 6167


# Max size for uploads
max_request_size = 20_000_000 # in bytes


# Enables registration. If set to false, no users can register on this server.
allow_registration = true


allow_federation = true


trusted_servers = ["matrix.org"]


#max_concurrent_requests = 100 # How many requests Conduit sends to other servers at the same time
#log = "warn,state_res=warn,rocket=off,_=off,sled=off"


address = "127.0.0.1" # This makes sure Conduit can only be reached using the reverse proxy
#address = "0.0.0.0" # If Conduit is running in a container, make sure the reverse proxy (ie. Traefik) can reach it.
設定ファイルを編集したらパーミッションを設定します。
$ sudo chown -R root:root /etc/matrix-conduit
$ sudo chmod 755 /etc/matrix-conduit
$ sudo mkdir -p /var/lib/matrix-conduit/
$ sudo chown -R conduit:nogroup /var/lib/matrix-conduit/
$ sudo chmod 700 /var/lib/matrix-conduit/
リバースプロキシを設定する
Conduit自体はlocalhostの6167ポートで動いていますので、外部から到達できるようになんらかのWebサーバーでリバースプロキシを作ります。
今回はCaddyを使ってみます。
Caddyは設定が簡単でかつ証明書処理がデフォルトで自動化されており、HTTPS対応のサイトをすぐに準備できます。
/etc/caddy/Caddyfile に以下の設定を記載します。
サーバー名, サーバー名:8448 {
        reverse_proxy /_matrix/* 127.0.0.1:6167
}
記載したら設定を反映させます。
$ sudo systemctl enable caddy
動かしてみよう
これで設定は終わりです。
動かしてみましょう。
$ sudo systemctl start conduit
Elementで接続してみます。
指定したサーバー名を記入して、続行するを押してみましょう。
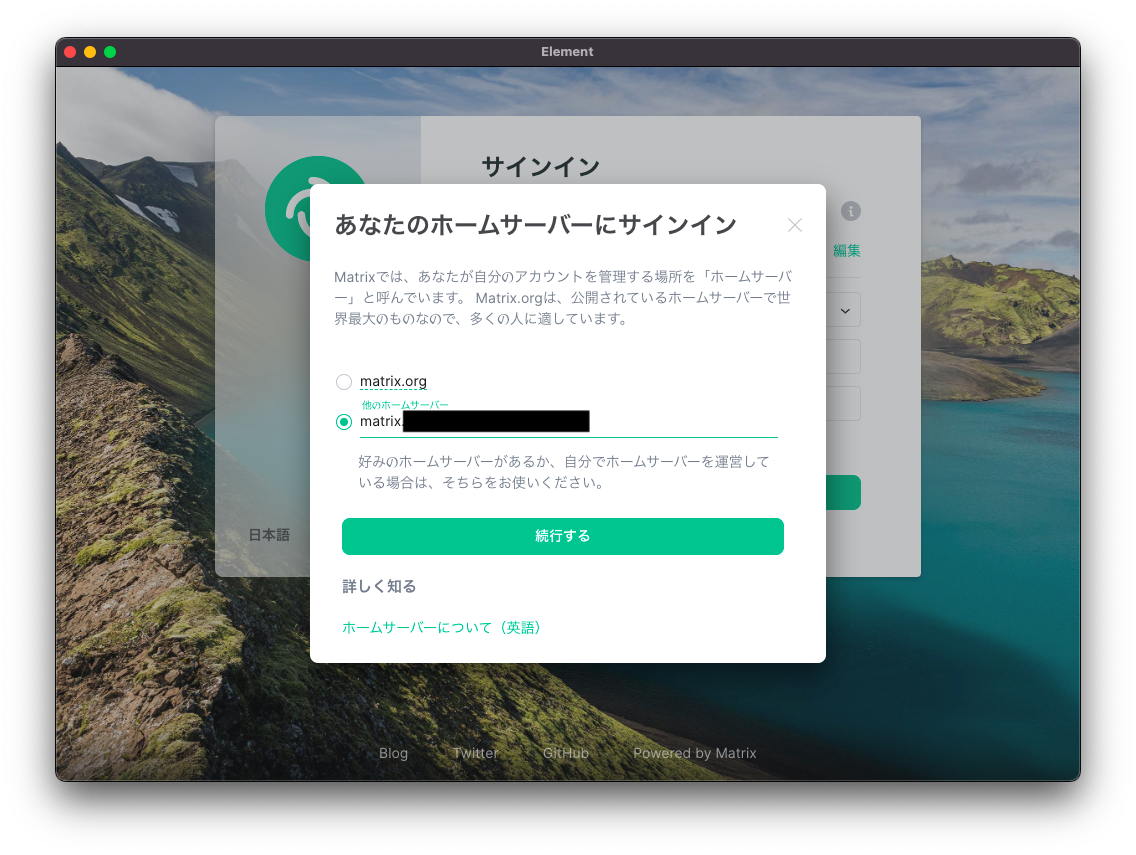 接続できました。

他のサービスとのBridgeやその他のオプションに対応するためにはさらに設定が必要なのですが、テキストメッセージのやり取りを行うだけであればこれで環境の構築は完了となります。
まとめ
いかがだったでしょうか。
思ったより簡単に動かすことができたかと思います。
大型連休中ですので、この機会にぜひmatrixを試してみてください。
リベル・エンタテインメントでは、このような最新技術などの取り組みに興味のある方を募集しています。もしご興味を持たれましたら下記サイトにアクセスしてみてください。 https://liberent.co.jp/recruit/